Steps to Make a DIY Hose Reel for a Beautiful Garden
Learn how to make your own DIY hose reel for a beautiful garden with our step-by-step guide. Save money and add a touch of customization to your outdoor space.

Have you ever found yourself struggling with a tangled mess of hoses in your garden? Or perhaps you've been frustrated by not having a proper place to store your garden hoses, leading to a cluttered and disorganized outdoor space. If you can relate, then you're in luck!
In this blog post, we're going to show you step-by-step instructions on how to make a DIY hose reel for a beautiful garden. Not only will this reel keep your hoses neatly stored and easily accessible, but it will also add a touch of charm to your outdoor space. So, grab your tools and let's get started on creating a practical and visually appealing solution for your garden hose storage needs.
Why You Should Create a DIY Hose Reel for Your Garden
A DIY hose reel offers numerous advantages for every gardener, whether you're a seasoned pro or just starting your gardening journey. Here are a few reasons why creating your own hose reel is a great idea:
Cost-effective: Buying a hose reel from a store can be expensive. By making your own, you can save money and invest it in other essential gardening tools or plants.
Customizability: When you create your DIY hose reel, you have the freedom to customize it to your specific needs. You can choose the size, color, and style that best suits your garden aesthetic and space requirements.
Creativity: Building your own hose reel allows you to tap into your creative side. You can add personal touches or decorative elements that make your reel a unique and attractive addition to your garden.
Satisfaction: There's something incredibly satisfying about building something with your own hands. When you create your hose reel, you'll feel a sense of accomplishment and pride in your DIY skills.
What You'll Need for This Project
Before you dive into building your DIY hose reel, it's important to gather all the necessary materials and tools. Here's a list of what you'll need:
Wood: Choose a sturdy and weather-resistant wood, such as cedar or pressure-treated lumber. The dimensions will depend on the size of the hose reel you plan to build.
Saw: A saw will be essential for cutting the wood to the desired lengths. A circular saw or a handsaw should work well for this project.
Screws: Select screws that are appropriate for outdoor use and can securely hold the wood pieces together.
Drill: A drill will be needed to create pilot holes for the screws and to attach the various components of the hose reel.
Measuring tape: Accurate measurements are crucial for ensuring that all the pieces fit together properly. A measuring tape will help you achieve precision in your project.
Sandpaper: To create a smooth finish on your hose reel, you'll need sandpaper to remove any rough edges and imperfections.
Paint or stain: If you want to add a pop of color or protect your wood from the elements, consider using paint or stain to finish your hose reel.
Now that you know why a DIY hose reel is a great addition to your garden and have gathered all the necessary materials and tools, let's move on to the step-by-step guide to building your own hose reel.
Step 1: Measure and Plan
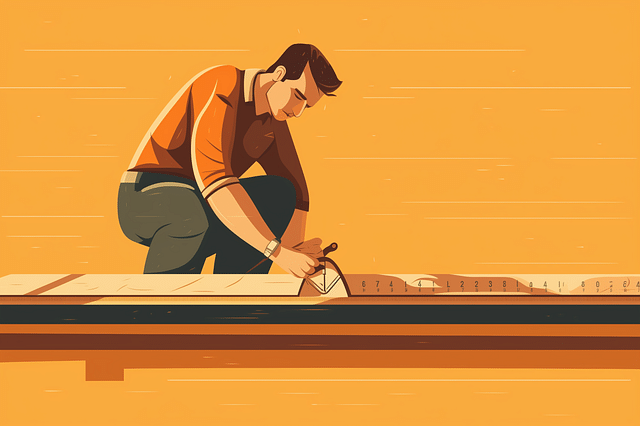
Before you start building your hose reel, it's important to carefully measure your hose and plan out the design. This will ensure that your reel fits your hose properly and meets your specific needs. In this step, we'll cover three key aspects: measuring your hose, determining the size and shape of your reel, and sketching your design.
Measuring Your Hose
Start by measuring the length of your hose from end to end. This will give you an accurate idea of how long your hose reel needs to be. Additionally, measure the diameter of your hose, as this will determine the width of the reel spindle.
Determining the Size and Shape of Your Reel
Consider the space where you plan to install your hose reel. Measure the available width, height, and depth to determine the maximum size your reel can be. This will help you choose the appropriate dimensions for your reel. Additionally, take into account any specific requirements or constraints you may have, such as a small garden or limited storage space.
When it comes to the shape of the reel, you have several options. The most common shapes are square or rectangular, but you may also consider a circular or oval design depending on your preferences and available space.
Sketching Your Design
Before you start building, it's a good idea to sketch out your hose reel design. This will help you visualize the final product and ensure that all the necessary components are included. Use a pencil and paper to sketch the overall shape, dimensions, and any additional features or embellishments you want to include.
Remember, this is just a rough sketch, so don't worry about perfection. The purpose of sketching is to plan out the basic structure and layout of your hose reel.
By taking the time to measure your hose, determine the size and shape of your reel, and sketch your design, you'll set yourself up for a successful hose reel construction project. This careful planning will ensure that your reel fits your hose perfectly and meets all your needs.
Step 2: Gather Materials and Tools
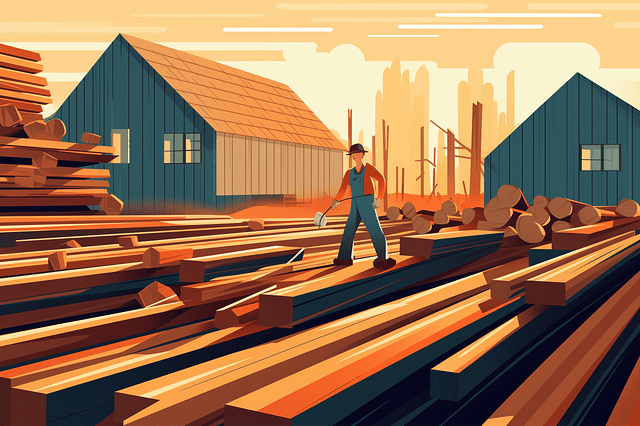
Now that you have a clear plan in place, it's time to gather all the materials and tools you'll need for your project. This step is crucial as having the right supplies will ensure a successful and efficient process. In this section, we'll cover the essential tools you'll need, how to choose the right materials for durability and aesthetics, and provide some helpful tips for sourcing materials.
Essential Tools for the Project
Before you begin your project, it's important to have the necessary tools on hand. Here are some essential tools that you should consider:
- Measuring tools: A tape measure, ruler, and level will help you accurately measure and align your materials.
- Cutting tools: Depending on your project, you may need a saw, utility knife, or shears to cut materials to the desired length and shape.
- Fastening tools: Nails, screws, a drill, and a hammer will be necessary for securing materials together.
- Safety equipment: Don't forget to prioritize safety! Safety glasses, gloves, and a dust mask should be used when necessary.
Make sure to gather all the necessary tools before you begin your project. This will save you time and frustration down the line.
Choosing the Right Materials for Durability and Aesthetics
The materials you choose for your project will not only affect its durability but also its overall aesthetics. Here are some key factors to consider when selecting materials:
- Durability: Think about the intended use of your project. If it will be exposed to the elements or heavy use, opt for materials that are known for their durability, such as pressure-treated wood or weather-resistant metals.
- Aesthetics: Consider the visual appeal of the materials. Do you want a natural and rustic look or a sleek and modern one? Choose materials that align with your desired style and overall aesthetic.
It's also a good idea to consult with professionals or experts who can provide guidance on which materials will work best for your specific project. They can offer valuable insights and help you make informed decisions.
Tips for Sourcing Materials
When it comes to sourcing materials, here are a few tips to keep in mind:
- Research local suppliers: Start by researching local suppliers and retailers who carry the materials you need. This will help you save on shipping costs and allows for easier returns or exchanges if necessary.
- Compare prices: Take the time to compare prices from different suppliers to ensure you're getting the best deal possible. Look for sales or discounts that may be available.
- Consider alternative options: Don't be afraid to explore alternative materials that may be more cost-effective or readily available. For example, reclaimed wood can provide a unique and eco-friendly option for certain projects.
By following these tips, you'll be able to gather the necessary materials for your project without breaking the bank. Take the time to plan and source your materials thoughtfully – it will make a noticeable difference in the end result.
Step 3: Cutting and Shaping the Wood
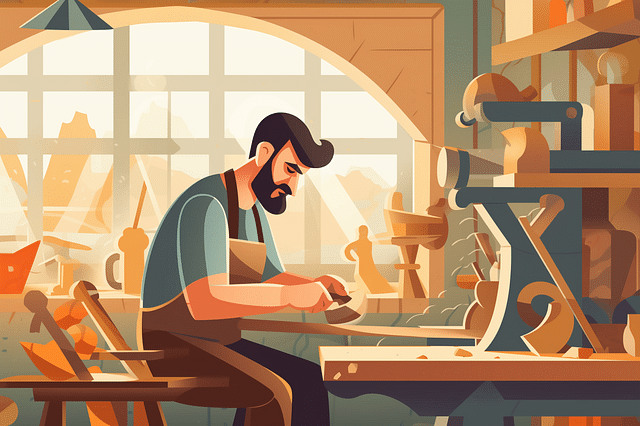
Now that you have gathered all the necessary tools and materials, it's time to start cutting and shaping the wood for your project. This step is crucial in ensuring that your finished piece comes out looking just the way you envisioned it. In this section, we'll go over the different aspects of cutting and shaping wood, from preparing the wood pieces to using the right sawing techniques for different wood types.
Preparing the Wood Pieces
Before you start cutting, it's important to properly prepare your wood pieces. This involves checking for any imperfections or defects in the wood, such as knots or splits. Carefully inspect each piece and set aside any that are not suitable for your project.
Next, make sure that all your wood pieces are clean and free from any dirt or debris. Use a soft brush or cloth to remove any sawdust or particles that may have accumulated on the surfaces. This will help ensure that your cuts are smooth and precise.
Marking and Measuring for Accurate Cuts
To achieve accurate cuts, it's essential to mark and measure your wood pieces correctly. Before making any cuts, take a moment to plan out your design and determine the measurements needed for each piece.
Use a pencil or a marking gauge to mark the dimensions and angles on your wood pieces. It's important to make these marks clearly and accurately, as they will serve as your guide during the cutting process. Measure twice and cut once to avoid any costly mistakes.
Using Sawing Techniques for Different Wood Types
Different wood types have different characteristics, and it's important to use the right sawing techniques for each type. Some woods are harder and denser, while others are softer and easier to work with. Understanding the properties of the wood you are working with will help you achieve better results.
For softer woods, such as pine or cedar, a crosscut saw or a circular saw with a fine-toothed blade is recommended. These saws will give you clean and smooth cuts. For hardwoods, such as oak or maple, it's best to use a rip saw or a bandsaw with a coarser blade. These saws are designed to handle the density of hardwoods and will make your cuts easier and more efficient.
When using any saw, make sure to use proper safety precautions, such as wearing safety goggles and keeping your fingers away from the blade. Always follow the manufacturer's instructions for your specific saw to ensure safe and effective operation.
By properly preparing your wood pieces, marking and measuring accurately, and using the right sawing techniques for different wood types, you'll be well on your way to creating a beautifully crafted piece. Take your time and be patient, and soon enough, you'll see your project come to life before your eyes.
Step 4: Assembling the Hose Reel
Now that you have all the necessary parts, it's time to begin assembling the hose reel. In this step, we will guide you through attaching the base and supports, securing the axles and handles, and adding any extra features for convenience, such as hose guides.
Attaching the Base and Supports
The first step in assembling the hose reel is to attach the base and supports. Begin by placing the base on a flat surface, making sure it is stable and level. Then, locate the holes on the base where the supports will go. Align the supports with the holes and insert the screws provided. Using a screwdriver or drill, tighten the screws until the supports are securely attached to the base.
Securing the Axles and Handles
Once the base and supports are in place, it's time to secure the axles and handles. Start by locating the axles and handles that came with your hose reel kit. Insert one end of each axle into the holes on the supports, making sure they fit snugly. Then, attach the handles to the other ends of the axles, ensuring they are securely fastened.
Adding Extra Features for Convenience (e.g., hose guides)
To make your hose reel even more convenient to use, consider adding some extra features, such as hose guides. Hose guides help prevent the hose from kinking or tangling, making it easier to unwind and rewind. You can typically find hose guides that attach to the sides of the reel or stand on the ground nearby. Simply follow the manufacturer's instructions to attach the hose guides to your hose reel.
Don't forget to double-check all the connections and ensure that everything is tightly secured before moving on to the final step.
Step 5: Sanding and Finishing
In this step, we will focus on sanding your reel to ensure smoothness, applying a protective finish for longevity, and enhancing the aesthetics with paint or stain.
Sanding Your Reel to Ensure Smoothness
To start, sanding your reel is an important step to achieve a smooth finish. Begin by using sandpaper with a medium grit, around 120 to 150, to remove any rough spots or imperfections on the surface of the reel. You can use a sanding block or simply sand by hand in a circular motion, paying close attention to the edges and corners.
Once you have sanded the entire surface, switch to a finer grit sandpaper, such as 220 or 320, to further smooth the reel. This will help create a polished look and ensure a comfortable grip during use. Remember to sand in the same direction as the wood grain to avoid any unwanted scratches or marks.
After sanding, wipe away any dust or debris with a clean cloth or tack cloth. This will prepare the surface for the next step in the finishing process.
Applying Protective Finish for Longevity
Applying a protective finish will not only enhance the look of your reel but also provide durability and longevity. There are various options for protective finishes, such as varnish, polyurethane, or wood oils.
Before applying the protective finish, ensure that the surface of the reel is clean and free from any dust or residue. Follow the manufacturer's instructions for the specific finish you choose, as application methods may vary.
Using a brush, apply a thin and even coat of the protective finish to the entire surface of the reel. Make sure to cover all areas, including the edges and corners. Allow the first coat to dry completely before applying additional coats, if necessary.
Once the protective finish has dried, you can lightly sand the surface between coats to create a smoother finish. This step is optional but can help achieve a more polished appearance. Be sure to remove any sanding dust before applying subsequent coats.
Enhancing the Aesthetics with Paint or Stain
If you want to add a personal touch or enhance the aesthetics of your reel, consider painting or staining it. This step is optional and can be a fun way to customize your reel to match your style or fishing gear.
Before applying paint or stain, make sure the surface of the reel is clean and free from any dust or debris. If necessary, sand the surface lightly with a fine-grit sandpaper to create a smooth base.
If you choose to paint your reel, use a paint designed for wood surfaces. Apply thin and even coats, allowing each coat to dry before adding additional layers. You can use a brush or spray paint, depending on your preference.
Alternatively, if you prefer the natural look of the wood, you can use a wood stain. Apply the stain with a brush or rag, following the manufacturer's instructions. Allow the stain to penetrate the wood for the recommended time before wiping away any excess.
Once the paint or stain has dried, you can add a protective finish over it to seal and protect the surface.
By following these steps, you can achieve a smooth and finished look for your reel while also adding your own personal touch.
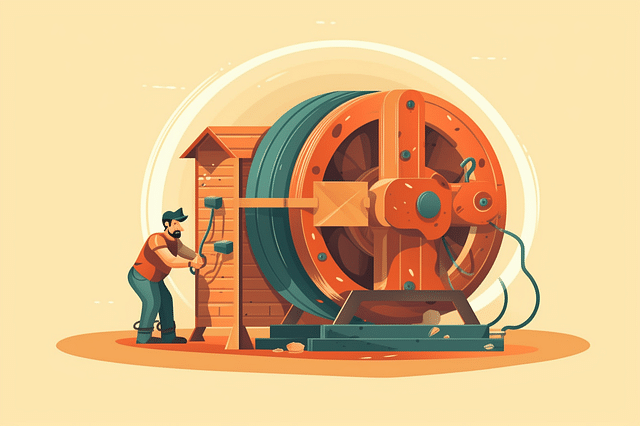
Step 6: Mounting Your DIY Hose Reel
Congratulations on reaching the final step of building your own hose reel! Now that you have built the reel, it's time to mount it in your garden. In this section, we will cover important considerations such as choosing the ideal location, installing the reel on a wall, fence, or stand, and ensuring stability and easy hose access.
Choosing the Ideal Location in Your Garden
Before mounting your DIY hose reel, it's essential to choose the right location in your garden. Here are a few things to keep in mind:
Accessibility: Select a spot that is easily accessible for you to use your hose. This should ideally be close to a water source.
Water Drainage: Ensure that the chosen location has proper water drainage to prevent any water accumulation around the hose reel.
Sun Exposure: Consider the amount of sun exposure the area receives. Excess sunlight can cause damage to the hose and reel over time, so choose a spot that offers some shade.
Installing Your Hose Reel on a Wall, Fence, or Stand
Once you've chosen the ideal location, it's time to install your DIY hose reel. The method of installation will largely depend on the type of reel you have built.
Wall Mounting: If you have designed your reel to be mounted on a wall, locate and mark the studs on the wall using a stud finder. Use screws or bolts to securely attach the reel to the wall, making sure it is level.
Fence Mounting: For a fence-mounted reel, use sturdy brackets or hooks designed for this purpose. Attach the brackets or hooks to the fence using screws or nails, and then hang the reel on them.
Stand Installation: If you have built a stand-alone hose reel, find a level spot in your garden and place the reel on it. Ensure that the stand is stable and won't tip over easily.
Ensuring Stability and Easy Hose Access
To ensure stability and easy hose access, follow these steps:
Secure the Mount: Double-check that the reel is securely mounted or placed on the stand. If using screws or bolts, tighten them to ensure a firm hold. If the reel wobbles or feels unstable, make adjustments before continuing.
Proper Hose Alignment: Make sure the hose is properly aligned on the reel to prevent kinks or tangling. Wind the hose onto the reel evenly and avoid overlapping sections.
Clear Pathway: Ensure that there is a clear pathway from the water source to the hose reel, allowing for easy maneuverability. Trim any overhanging branches or vegetation that may obstruct the pathway.
By following these steps, you can safely mount your DIY hose reel in your garden, ensuring stability and easy access to your hose. Take your time to choose the ideal location, and install it securely, so you can enjoy the convenience of a well-organized hose storage system.
Trending products
Shop outdoor accessories
Frequently asked questions
- What materials do I need to make a DIY hose reel?
- To make a DIY hose reel, you will need materials such as wood, screws, a drill, measuring tape, and a saw.
- Do I need any woodworking skills to make a DIY hose reel?
- While basic woodworking skills will be helpful, this project can be completed by beginners. Just follow our step-by-step guide, and you'll be able to make your own DIY hose reel with ease.
- How can a DIY hose reel benefit my garden?
- A DIY hose reel can help you keep your garden organized by providing a convenient and tidy storage solution for your garden hose. It not only helps in extending the lifespan of your hose but also adds a touch of customization to your outdoor space.
- Can I customize the design of my DIY hose reel?
- Absolutely! That's the beauty of making your own DIY hose reel. You can customize the design to suit your style and preferences. Whether you want a rustic look or a modern design, you have the freedom to create a hose reel that matches your garden aesthetic.
- How long does it take to make a DIY hose reel?
- The time required to build a DIY hose reel will vary depending on your woodworking skills and the complexity of your chosen design. However, most people can complete this project within a day or two.
- Are there any specific safety precautions I should take while building a DIY hose reel?
- Yes, it's important to wear proper safety gear, such as safety glasses and gloves, when working with tools and equipment. Additionally, make sure to read and follow the instructions for any power tools you'll be using.
- Can I use any type of wood for my DIY hose reel?
- While you can use various types of wood for your DIY hose reel, it's recommended to choose a type that is weather-resistant and durable, such as cedar or pressure-treated lumber.
- How do I maintain my DIY hose reel?
- To maintain your DIY hose reel, ensure it is properly sealed or stained to protect it from weather elements. Regularly inspect the reel and clean it if necessary to prevent dirt or debris buildup.
- Can I paint my DIY hose reel?
- Yes, you can paint your DIY hose reel to further personalize it. Use exterior-grade paint that can withstand outdoor conditions and choose a color that complements your garden's overall aesthetic.
- Where can I find step-by-step instructions for making a DIY hose reel?
- You can find step-by-step instructions for making a DIY hose reel on various DIY websites, blogs, or YouTube channels dedicated to woodworking and gardening projects.
Are you looking for more ideas?
Have a look at these other guides about improving your garden and patio to create your dream outdoor space!

Are you looking for more ideas?
-
- Role
- Ideas to Improve Your Front yard in the Summer
- Description
- Unlock the secrets to transforming your front yard with these creative and practical ideas for summer landscaping. Enhance the beauty of your lawn and elevate your curb appeal with expert tips and tricks. Start your front yard transformation today.
-
- Role
- The Ultimate Guide to Creating a Colorful Summer Garden
- Description
- Unlock the secrets of a vibrant summer garden! Discover expert tips on what to plant in April for a colorful and stunning garden this summer. Don't miss out, read our ultimate guide now!
-
- Role
- How to Choose the Right Gazebo for Your Backyard
- Description
- Discover the best gazebo for your backyard oasis! Our comprehensive guide will help you choose the right gazebo at the perfect cost.
-
- Role
- How to Easily Convert Your Beach Umbrella to a Patio Umbrella
- Description
- Learn how to effortlessly transform your beach umbrella into a versatile patio umbrella. Enhance your outdoor experience with this simple and effective conversion method. Upgrade your shade game today with our step-by-step guide.