Cheapest Way To Cover Dirt In Backyard - 5 Cost-Effective Solutions
Discover the most affordable ways to cover dirt in your backyard with our expert tips. Find out how to transform your outdoor space on a budget with these cost-effective solutions.
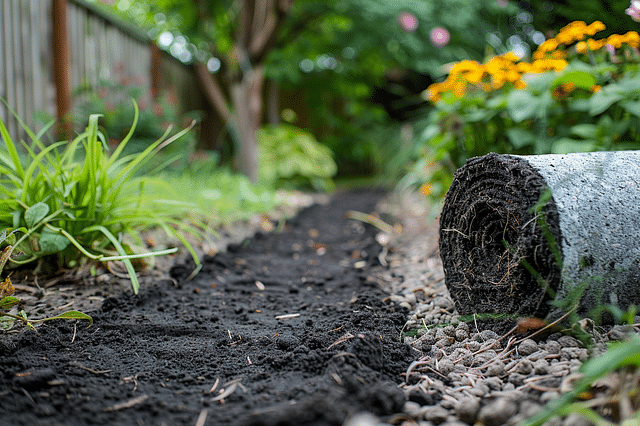
Do you have a backyard filled with unsightly dirt patches? Are you tired of looking at barren ground every time you step outside? We understand your frustration. Having a beautiful, well-maintained backyard is a dream for many homeowners. However, landscaping projects can be quite expensive, especially when it comes to covering up large areas of dirt. But don't worry, because we have some good news for you!
In this blog post, we will share with you the cheapest way to cover dirt in your backyard. We have compiled a list of 6 cost-effective solutions that will help you transform your outdoor space without breaking the bank.
So, let's dive in and explore these budget-friendly options together!
Option 1: Mulch

If you're looking for an easy and effective way to cover the dirt in your backyard, mulch is a fantastic option to consider. Not only does it provide a neat and tidy appearance, but it also brings numerous benefits to your plants and soil. Let's dive into what mulch is and how you can use it to cover the dirt in your backyard.
What is mulch?
Mulch is a layer of material that you can spread over the soil surface in your backyard. It can be made of various organic or inorganic materials, such as shredded bark, wood chips, straw, leaves, or even rocks. Mulch serves as a protective barrier that helps retain moisture in the soil, suppresses weed growth, regulates soil temperature, and improves soil fertility by gradually breaking down and adding nutrients.
How to use mulch to cover dirt in your backyard
Covering the dirt in your backyard with mulch is a straightforward process. Here's a simple step-by-step guide to help you get started:
Clear the area: Begin by removing any large debris, rocks, or weeds from the dirt in your backyard. This will ensure a clean surface for the mulch.
Prepare the soil: If the soil is excessively compacted or dry, it's a good idea to loosen it up with a garden fork or tiller. Additionally, you can apply a thin layer of compost or organic matter to enhance the soil's health and fertility.
Choose the mulch: Select a type of mulch that suits your needs and preferences. Shredded bark or wood chips are popular choices due to their attractive appearance and ability to break down gradually, releasing nutrients into the soil.
Apply the mulch: Spread a layer of mulch evenly over the dirt in your backyard, aiming for a thickness of around 2-4 inches. Avoid piling mulch directly against the stems or trunks of plants, as this can lead to moisture-related issues and potential pest problems.
Maintain the mulch: Regularly inspect your mulch layer and replenish it as needed. Over time, the mulch may break down or thin out, so adding an additional layer every year or two will help maintain its effectiveness.
By following these simple steps, you'll have a beautifully covered and well-protected dirt surface in your backyard. Enjoy the numerous benefits that mulch brings to your plants and soil as you admire the neat and tidy appearance of your outdoor space.
Option 2: Groundcover Plants

Groundcover plants are low-growing plants that spread across the ground, forming a dense and uniform cover. They are a great option for filling in empty spaces in your backyard, preventing soil erosion, and adding beauty to your outdoor space.
What are groundcover plants?
Groundcover plants are a type of plants that grow close to the ground and spread out, forming a lush carpet-like cover. They typically have trailing stems or runners that help them spread and fill in areas. These plants come in various species and varieties, including grasses, vines, and flowering plants. Some popular groundcover plants include periwinkle, creeping thyme, creeping phlox, and ajuga.
Not only do groundcover plants add aesthetic appeal to your garden, but they also have practical benefits. They can help suppress weed growth, reduce soil erosion, and retain moisture in the soil. Additionally, groundcover plants can serve as a natural habitat for beneficial insects, birds, and small mammals.
How to plant and maintain groundcover plants in your backyard
Choose the right plants: Before planting groundcover plants, consider the specific conditions in your backyard, such as the amount of sunlight, soil type, and moisture levels. Different groundcover plants have different preferences, so selecting ones that are suitable for your site is essential. Consult with a local garden center or do some research to find out which plants will thrive in your area.
Prepare the soil: Ensure that the soil is well-draining and free from weeds. Remove any existing weeds or grass from the area where you plan to plant the groundcover plants. Loosen the soil with a garden fork or tiller and add organic matter, such as compost, to improve fertility.
Plant the groundcover: Follow the planting instructions provided with the specific groundcover plants you have chosen. Generally, you will dig a hole slightly larger than the plant's root ball, place the plant in the hole, backfill with soil, and gently firm the soil around the plant. Space the plants according to their recommended spacing to allow for proper growth and spreading.
Water regularly: After planting, water the groundcover plants thoroughly to help them establish. Keep the soil consistently moist, but not waterlogged, during the initial stages of growth. Once the plants are established, reduce the frequency of watering, but ensure they receive enough moisture during dry spells.
Mulch and weed control: Apply a layer of mulch around the base of the groundcover plants to help suppress weed growth, conserve moisture, and regulate soil temperature. Regularly inspect the area for weeds and remove them promptly to prevent competition for nutrients and space.
Prune and trim: Depending on the type of groundcover plants you have planted, you may need to prune or trim them regularly to maintain their shape and promote healthy growth. Consult the specific plant's care instructions for guidance on pruning techniques and timing.
Fertilize as needed: Some groundcover plants may benefit from occasional fertilization to promote vigorous growth and beautiful foliage or flowers. Follow the recommended fertilization schedule and application methods specific to the chosen plants.
By incorporating groundcover plants in your backyard, you can enjoy a low-maintenance and visually appealing landscape. These plants provide a natural ground cover, reduce the need for excessive lawn maintenance, and add interest to your outdoor space. With proper care and maintenance, your groundcover plants will thrive and create a beautiful and sustainable garden.
Option 3: Artificial Turf

If you're tired of dealing with the hassle of maintaining natural grass in your backyard, then artificial turf might be the perfect solution for you. Artificial turf, also known as synthetic grass, is a type of turf made from synthetic materials that closely resemble real grass. It offers a number of advantages over natural grass and has become increasingly popular among homeowners. In this section, we will explore what artificial turf is and why you should consider choosing it for your backyard.
What is artificial turf and why choose it?
Artificial turf is a man-made alternative to natural grass that is crafted from synthetic materials like polypropylene, polyethylene, or nylon. It is designed to mimic the look and feel of real grass, giving your backyard a lush and vibrant appearance all year round.
One of the main reasons why people choose artificial turf is its low maintenance requirements. Unlike natural grass, artificial turf does not need to be mowed, watered, or fertilized. This saves you time, effort, and money on maintenance tasks. Additionally, artificial turf is resistant to pests and diseases, reducing the need for harmful chemical treatments. It also eliminates the need for harmful pesticides or herbicides, making it an environmentally friendly choice.
Another advantage of artificial turf is its durability. It can withstand heavy foot traffic, extreme weather conditions, and even the antics of pets and children without getting damaged or developing unsightly patches. This makes it an excellent option for high-use areas like backyard playgrounds or sports fields.
Artificial turf is also a great choice for water conservation. With growing concerns over water scarcity, many homeowners are opting for artificial turf as it requires little to no watering. This not only helps to conserve water, but also lowers your water bills. Moreover, artificial turf requires no mowing, which means no greenhouse gas emissions from lawn mowers.
Lastly, artificial turf provides a consistent and attractive appearance throughout the year. Regardless of the weather or season, your backyard will always look green and well-manicured. You won't have to worry about unsightly brown patches or mud stains from foot traffic.
How to install artificial turf in your backyard
Installing artificial turf in your backyard can be a straightforward process if you follow the right steps. Here is a step-by-step guide to help you get started:
Prepare the area: Remove any existing grass, rocks, or debris from the area where you plan to install the artificial turf. Ensure that the ground is smooth and level.
Install the base: Lay down a layer of crushed rock or gravel to create a stable base for the turf. Compact the base using a compactor or a hand tamper to ensure it is firm and even.
Add a weed barrier: Lay a weed barrier over the base to prevent weeds from growing through the turf. This will help to maintain a clean and weed-free lawn.
Lay the turf: Roll out the artificial turf over the prepared area. Take care to align the edges and avoid any wrinkling. Cut the turf to fit the shape of your backyard using a sharp utility knife.
Secure the turf: Use landscape staples or turf nails to secure the edges of the turf every 6-8 inches along the perimeter. This will prevent the turf from shifting or coming loose.
Infill the turf: Spread an infill material, such as silica sand or crumb rubber, over the turf to provide stability and cushioning. Brush the infill into the fibers of the turf using a stiff broom or a power brush.
Brush and fluff the turf: Use a broom or a power brush to brush the turf fibers in an upward direction. This will give your artificial lawn a more natural and realistic appearance.
By following these steps, you can transform your backyard into a beautiful and low-maintenance space with artificial turf. Enjoy the benefits of a green, lush lawn without the hassle of traditional grass upkeep.
Option 4: Gravel

Have you considered using gravel as a solution to cover the dirt in your backyard? Gravel is a versatile and low-maintenance option that can give your outdoor space a clean and polished look. Not only that, but it also helps with drainage and prevents soil erosion. In this section, we will guide you through the process of using gravel to cover the dirt in your backyard.
Using gravel to cover dirt in your backyard
Before you begin laying gravel in your backyard, it's important to prepare the area properly. Here are the steps to follow:
Clear the area: Remove any debris, rocks, or weeds from the area where you plan to lay the gravel. Make sure the surface is clean and level.
Measure and mark: Use a tape measure to determine the dimensions of the area you want to cover with gravel. Mark the boundaries using stakes or flags.
Create a border: To keep the gravel in place, you can install edging along the perimeter of the area. This can be plastic or metal strips, wooden boards, or even rocks.
Lay a weed barrier: To prevent weeds from growing through the gravel, lay a weed control fabric or landscape fabric over the dirt. This will help maintain a weed-free surface.
Calculate the amount of gravel needed: Measure the length and width of the area and multiply the two numbers to find the square footage. Then, determine the depth of gravel you want to use (typically around 2-3 inches). Use an online calculator or consult with a landscaping professional to determine the amount of gravel you'll need.
Spread the gravel: Start by spreading a layer of gravel evenly across the area. Use a rake or shovel to distribute it and ensure a consistent thickness.
Compact the gravel: Use a tamper, roller, or even the back of a shovel to compact the gravel. This will provide a more stable surface and prevent the gravel from shifting.
Check for evenness: Walk across the surface of the gravel to check for any uneven areas. If you notice any low spots, add more gravel and compact again until the surface is level.
Maintain the gravel: Regularly rake and remove any debris or leaves that accumulate on the gravel. This will help keep it clean and prevent any issues with drainage.
By following these steps, you can create a beautiful and functional outdoor space using gravel to cover the dirt in your backyard. Enjoy the aesthetic appeal and low maintenance of this versatile option!
Option 5: Pavers or Stepping Stones

Are you tired of looking at that bare patch of dirt in your backyard? Don't worry, there's an easy and stylish solution – pavers or stepping stones! These versatile landscaping materials can not only cover up unsightly dirt but also add charm and functionality to your outdoor space. Let's explore how you can use pavers or stepping stones to transform your backyard.
Using pavers or stepping stones to cover dirt in your backyard
Pavers and stepping stones are a great way to create a clean and polished look in your backyard. They offer a beautiful alternative to traditional grass or dirt surfaces. Plus, they are incredibly versatile and can be used for various purposes, such as creating walkways, patio areas, or even stepping stone paths through your garden.
By using pavers or stepping stones, you can say goodbye to muddy footprints and uneven terrain. Instead, you'll have a stable and attractive surface that is easy to maintain and enjoy. Whether you have a small garden or a vast backyard, pavers or stepping stones can be customized to fit any space.
How to install pavers or stepping stones in your backyard
Installing pavers or stepping stones may seem like a daunting task, but it's actually quite straightforward. Here's a step-by-step guide to help you get started:
Plan your design: Before you begin, take some time to plan out your design. Consider the layout, spacing, and pattern of your pavers or stepping stones. This will ensure a cohesive and visually appealing result.
Prepare the area: Clear the area where you want to install the pavers or stepping stones. Remove any vegetation, weeds, or debris. Level the ground and ensure it is compacted.
Lay a base: Create a stable base for your pavers or stepping stones by laying a layer of gravel or sand. This will help with drainage and prevent shifting or sinking over time. Use a tamper to compact the base.
Place the pavers or stepping stones: Carefully place each paver or stepping stone in your desired pattern. Use a level to ensure they are even and flat. If needed, adjust the base by adding or removing gravel or sand.
Fill the gaps: Once all the pavers or stepping stones are in place, fill the gaps between them with more sand or gravel. Use a broom or brush to sweep the material into the cracks, making sure it is evenly distributed.
Secure the edges: To keep the pavers or stepping stones in place, install edging along the perimeter. This can be done using plastic or metal edging materials. Secure them firmly in the ground to prevent movement.
Finishing touches: Finally, walk over the entire area to ensure that everything is level and secure. Make any necessary adjustments before admiring your newly installed pavers or stepping stones.
With just a few simple steps, you can transform your backyard into a stunning and functional space using pavers or stepping stones. Don't let that bare patch of dirt hold you back from enjoying your outdoor oasis – get creative with pavers or stepping stones today!
Conclusion
In conclusion, taking care of your backyard doesn't have to be expensive or complicated. By exploring the cost-effective solutions to cover dirt in your backyard and transforming it on a budget, you can create a beautiful outdoor space without breaking the bank.
In this guide, we have covered various methods to cover dirt in your backyard. From using mulch or gravel for a low-maintenance solution, to implementing ground covers and plants for a more natural and aesthetically pleasing look, there are options for every budget and preference.
Additionally, we have discussed how to transform your backyard on a budget. By reusing materials, repurposing items, and making the most of what you already have, you can breathe new life into your outdoor space without spending a fortune. Whether you want to create a cozy seating area, a vibrant garden, or a peaceful retreat, there are plenty of budget-friendly ideas to help you achieve your desired transformation.
Remember, transforming your backyard doesn't have to happen all at once. Take it step by step, implementing one cost-effective solution at a time, and gradually shaping your outdoor space to reflect your personal style and preferences.
So, go ahead and get started on your backyard transformation. With the cost-effective solutions and budget-friendly ideas provided in this guide, you can create a beautiful and inviting outdoor area that you and your loved ones can enjoy for years to come. Happy gardening!
Trending products
Shop outdoor accessoriesFrequently asked questions
- What are some affordable ways to cover dirt in my backyard?
- You can consider options like laying down mulch, using landscaping fabric, planting ground cover plants, or installing pavers or gravel.
- How can I transform my outdoor space on a budget?
- You can start by incorporating budget-friendly solutions like DIY projects, upcycling materials, shopping for deals, and planning strategically to make the most out of your budget.
- Is covering dirt in my backyard important?
- Yes, covering dirt in your backyard can help prevent erosion, reduce mud, improve aesthetics, and create a more usable space for outdoor activities.
- What are the benefits of using mulch to cover dirt in my backyard?
- Mulch can help retain moisture in the soil, suppress weeds, enhance soil fertility, and improve the appearance of your outdoor space.
- How do I choose the right solution to cover dirt in my backyard?
- Consider factors like your budget, maintenance requirements, desired aesthetics, and long-term goals when selecting the most suitable option for covering dirt in your backyard.
- Can I combine different solutions to cover dirt in my backyard?
- Yes, you can mix and match various cost-effective solutions like using a combination of mulch, ground cover plants, and gravel to cover dirt in different areas of your backyard.
- Are there any DIY projects I can consider to cover dirt in my backyard?
- Yes, you can explore DIY projects such as building raised garden beds, creating a rock garden, or constructing a pathway using affordable materials to cover dirt in your backyard.
- How can I make my outdoor space more inviting without breaking the bank?
- You can add inexpensive accessories like outdoor lighting, colorful plant containers, decorative accents, and cozy seating areas to enhance the charm of your backyard without overspending.
- What are some cost-effective landscaping ideas to cover dirt in my backyard?
- You can opt for low-maintenance plants, use recycled materials for hardscaping elements, create a focal point with a budget-friendly feature, or simply repurpose existing resources creatively in your backyard.
- Is it possible to create a beautiful backyard space without spending a fortune?
- Yes, by utilizing smart budgeting strategies, researching affordable landscaping solutions, and being creative with your design choices, you can achieve a stunning backyard transformation without breaking the bank.
Are you looking for more ideas?
Have a look at these other guides about improving your garden and patio to create your dream outdoor space!
Are you looking for more ideas?
-
- Role
- The Balcony Bliss: Outdoor Furniture for Small Spaces
- Description
- Discover space-saving outdoor furniture ideas that can turn even the smallest balcony into a relaxing retreat.
-
- Role
- How to Create a Cozy Outdoor Living Space
- Description
- Get ideas and tips for arranging outdoor furniture and accessories to create a cozy, inviting outdoor living area.
-
- Role
- Deck Design Ideas: Choosing the Right Outdoor Furniture
- Description
- Learn how to choose and arrange outdoor furniture to make your deck a comfortable and stylish outdoor living area.
-
- Role
- How to Select and Arrange Outdoor Furniture for a Fire Pit Area
- Description
- Learn how to create a safe, comfortable fire pit area with the right outdoor furniture and layout.
