11 Tips to Prepare Your Lawn and Backyard for Spring
Get your lawn and backyard ready for spring! Check out these 11 essential tips to ensure a clean and vibrant outdoor space. Don't miss out on the chance to transform your yard this season.

Have you ever looked outside your window after a long, cold winter and wondered how to bring your dull, lifeless lawn back to its green, vibrant glory? Well, get ready to roll up your sleeves and put on your gardening gloves because we've got you covered!
Spring is the perfect time to rejuvenate your lawn and backyard, preparing it for months of outdoor fun and relaxation. But where do you start? Don't worry, we've got your back! In this blog post, we will share 11 expert tips to help you prepare your lawn and backyard for the enchanting season of spring.
From nurturing your grass to sprucing up your garden beds, we've compiled a comprehensive guide that will take you from A to Z in lawn care. Whether you're a seasoned gardener or a newbie, these tips are designed to help you create a beautiful, thriving outdoor space that will make your neighbors envious.
So, let's dive in and transform your lawn and backyard into a haven of beauty and serenity. Get ready to breathe life back into your outdoor oasis with these 11 tips to prepare your lawn and backyard for spring!
Tip 1: Clean up debris

Keeping your lawn and backyard clean and free of debris is an essential part of maintaining a healthy and attractive outdoor space. In this section, we will explore why it is important to remove debris, the tools that can be used to clean it up effectively, and how to dispose of the debris properly.
Why is it important to remove debris from your lawn and backyard?
Removing debris from your lawn and backyard is crucial for several reasons. Firstly, debris such as fallen leaves, branches, and twigs can smother your grass and prevent healthy growth. It blocks sunlight and traps moisture, creating an environment that is conducive to mold and fungus growth.
Furthermore, leaving debris on your lawn and in your backyard can attract pests and rodents. These unwanted visitors can damage your plants, invade your home, and create sanitation issues. Removing debris regularly helps to deter these pests, keeping your outdoor space clean and safe.
Lastly, a cluttered and messy lawn and backyard can negatively affect the curb appeal of your home. If you take pride in your property, a clean and well-maintained outdoor space is essential. Removing debris contributes to a neat and tidy appearance, enhancing the overall beauty of your home.
What tools can be used to clean up debris effectively?
Cleaning up debris is made easier and more efficient with the right tools. Here are some of the most common tools used for debris removal:
Leaf rake: A leaf rake is a lightweight and versatile tool that is designed specifically for gathering and removing leaves. Its wide, fan-shaped head allows for easy collection and helps prevent damage to the grass.
Garden gloves: Sturdy gloves are essential when handling debris, especially if there are sharp objects such as thorns or broken glass. They protect your hands from potential injuries and provide a better grip when working with the debris.
Wheelbarrow or garden cart: A wheelbarrow or garden cart is useful for transporting large amounts of debris from one area to another. It saves time and energy by allowing you to move a significant amount of debris in one trip.
Pruning shears or loppers: These tools are necessary for cutting and removing small branches or twigs. Pruning shears are ideal for branches up to ¾ inch in diameter, while loppers are suitable for thicker branches. They help create a cleaner and more organized outdoor space.
How can you dispose of the debris properly?
Properly disposing of the debris you collect is essential for environmental and safety reasons. Here are some methods for disposing of debris:
Composting: If you have a compost bin or pile, certain types of debris such as leaves and small twigs can be added to create nutrient-rich compost. Avoid including diseased plants or weeds with seeds, as they can contaminate the compost.
Curbside pickup: Check with your local waste management or recycling center to see if they offer curbside pickup for yard waste. They may have specific guidelines for bundling or bagging the debris, so it's important to follow their instructions.
Municipal or community drop-off sites: Some municipalities or local organizations provide designated drop-off sites for yard waste and other debris. These locations may have specific hours of operation or require a small fee for disposal.
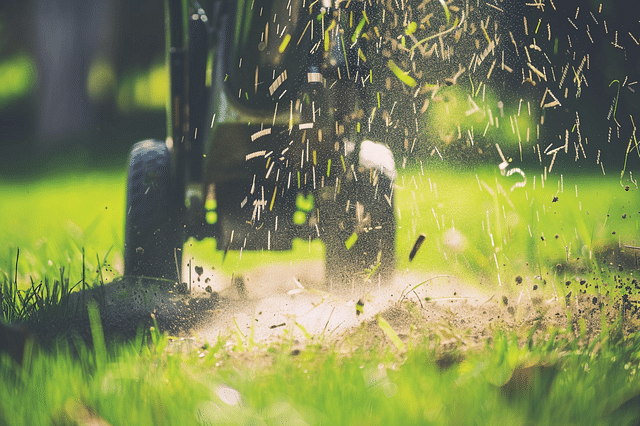
Mulching: Shredding leaves and small branches with a mulching mower can create a natural mulch that can be spread over your garden beds or around trees and shrubs. This method not only helps with weed suppression but also improves soil health.
By properly disposing of the debris you collect, you can contribute to a cleaner environment and ensure that the waste is handled in the most responsible manner possible.
Tip 2: Rake and dethatch the lawn

Taking care of your lawn involves more than just mowing and watering. If you want your lawn to be healthy and look its best, you need to give it some extra attention. One important step in lawn maintenance is raking and dethatching. In this section, we'll explore why raking and dethatching are necessary for your lawn, when the best time to do it is, and some techniques for doing it effectively.
Why is raking and dethatching necessary for your lawn?
Raking and dethatching are important for promoting a healthy lawn. Over time, your lawn can accumulate a layer of dead grass, leaves, and other organic material known as thatch. While a small layer of thatch is normal and can actually be beneficial, too much thatch can prevent water, air, and nutrients from reaching the roots of your grass. This can lead to a dull, unhealthy-looking lawn.
By raking and dethatching, you can remove excess thatch and allow your lawn to breathe. This will enable the roots to access the nutrients and moisture they need to grow strong and lush. Regular raking and dethatching also help prevent the buildup of pests and diseases that thrive in thatch.
When is the best time to rake and dethatch the lawn?
The best time to rake and dethatch your lawn depends on the type of grass you have. In general, it is best to do this in early spring or early fall when the weather is mild. These seasons provide the perfect conditions for your lawn to recover and grow. However, if your lawn has a heavy thatch layer, you may need to dethatch in late spring or early summer to give the grass time to recover before winter.
Avoid dethatching during extreme temperature periods or when your lawn is stressed due to drought or disease. It's also important to dethatch when the soil is slightly moist, as this makes it easier to remove thatch without damaging the grass.
What are some techniques for raking and dethatching effectively?
To effectively remove thatch and rake your lawn, follow these simple techniques:
- Start by mowing your lawn to a short height. This will make it easier to see and remove the thatch.
- Use a rake with sturdy tines and a comfortable grip. A thatching rake or a power rake can be useful for larger lawns with heavy thatch buildup.
- With gentle but firm strokes, rake the thatch in one direction, moving in straight lines across your entire lawn. Avoid raking too vigorously, as this can damage the healthy grass.
- Once you have raked the entire lawn, gather the thatch and dispose of it properly. You can compost it if you have a compost bin or bag it for disposal.
- After raking, give your lawn a good watering to help it recover and rejuvenate.
Remember, raking and dethatching can be physically demanding, so take breaks as needed and listen to your body. If your lawn has a severe thatch problem or you're unsure about the process, consider consulting a professional lawn care service for assistance.
By incorporating regular raking and dethatching into your lawn care routine, you'll help your grass stay healthy and maintain a vibrant, green appearance.
Tip 3: Aerate the soil
Have you ever wondered why some lawns look lush and healthy while others seem patchy and dull? One of the key factors contributing to a vibrant lawn is proper soil aeration. Aeration refers to the process of creating small holes in the soil to allow air, water, and nutrients to penetrate the roots of your grass. In this section, we will explore the benefits of soil aeration, how to determine if your lawn needs it, and different methods you can use.
Why is soil aeration beneficial for your lawn?
Soil aeration provides numerous benefits for your lawn's overall health and appearance. When the soil becomes compacted, the space between soil particles decreases, making it difficult for air, water, and nutrients to reach the grassroots. By aerating the soil, you create channels for these essential elements to access the roots, allowing for better absorption and utilization by the grass. Additionally, aeration helps alleviate soil compaction, promotes microbial activity, and enhances the overall resilience of your lawn against drought, pests, and diseases.
How can you determine if your lawn needs to be aerated?
Not every lawn requires aeration, so it's important to determine if your lawn could benefit from this practice. One way to test for soil compaction is by pushing a garden fork or a soil probe into the ground. If you encounter significant resistance or the tool doesn't penetrate easily, your soil is likely compacted and in need of aeration. Another indicator is if your lawn has heavy foot traffic or if it was recently established on new construction soil, which often lacks organic matter and is prone to compaction. By assessing these factors, you can determine if aeration is necessary to improve the health of your lawn.
What are different methods of soil aeration?
There are various methods to aerate your lawn, each with its own benefits and considerations. The two most common methods are core aeration and spike aeration.
Core aeration involves using a machine called a core aerator to remove small plugs or cores from the soil. This method is highly effective in relieving compaction and opening up the soil for improved air and water circulation. The removed cores gradually break down and mix with the soil, enhancing its structure over time. Core aeration is best suited for larger lawns or those with severe compaction issues.
Spike aeration, on the other hand, uses a tool with solid tines or spikes to puncture small holes in the soil. While spike aeration is a less invasive method, it does not remove soil cores like core aeration. This method is suitable for lighter compaction or as a maintenance practice between core aeration sessions. Spike aeration is often a good choice for smaller lawns or those with mild compaction issues.
Remember to aerate your lawn when the soil is moist, typically in the early spring or fall, to ensure the best results. Regularly aerating your lawn, as needed, will help create an optimal growing environment for your grass, resulting in a healthier and more vibrant lawn.
Tip 4: Fertilize the lawn

Taking care of your lawn involves more than just regular mowing and watering. One important aspect that should not be neglected is fertilizing. Fertilizing your lawn provides essential nutrients that help keep it healthy and lush. In this section, we will explore why fertilizing is important for your lawn's health, the different types of lawn fertilizers available, and the best time to apply fertilizer.
Why is fertilizing important for your lawn's health?
Fertilizing your lawn is crucial for maintaining its overall health and appearance. Lawns require nutrients to grow, just like any other living organism. Fertilizers provide these essential nutrients, such as nitrogen, phosphorus, and potassium, which are necessary for strong root development, lush green growth, and resistance to pests and diseases.
Over time, the soil in your lawn may become depleted of these nutrients, especially if your grass is constantly being cut and the clippings are not returned to the soil. Fertilizing helps replenish these nutrients, ensuring that your lawn receives the proper nourishment it needs to thrive.
Regular fertilization also helps to promote a dense and vigorous lawn, which in turn helps to prevent weeds from taking hold. When your grass is healthy and growing vigorously, it naturally crowds out weeds, reducing the need for herbicides.
What are the different types of lawn fertilizers available?
There are several types of lawn fertilizers available on the market, each with its own set of benefits. The most common types include:
Granular fertilizers: These are solid pellets or granules that you can spread over your lawn using a spreader. Granular fertilizers are typically slow-release, releasing nutrients gradually over time. They are easy to apply and allow for even distribution of nutrients.
Liquid fertilizers: These are fertilizers that are dissolved in water and applied to the lawn using a sprayer. Liquid fertilizers provide quick results as they are quickly absorbed by the grass roots. They are especially useful for addressing specific nutrient deficiencies or for providing a quick boost of nutrients during periods of stress.
Organic fertilizers: These fertilizers are derived from natural sources and do not contain synthetic chemicals. They are made from materials such as compost, animal manure, or bone meal. Organic fertilizers release nutrients slowly and improve the soil's overall health and structure.
Synthetic fertilizers: These fertilizers are manufactured using chemical compounds. They are typically high in nitrogen, phosphorus, and potassium, providing quick results. Synthetic fertilizers are often used to address specific nutrient deficiencies or to promote rapid growth.
Choosing the right type of fertilizer depends on various factors, including the specific needs of your lawn, your budget, and your personal preferences. It's a good idea to conduct a soil test or consult with a lawn care professional to determine the best fertilizer for your lawn.
When is the best time to apply fertilizer to your lawn?
The timing of fertilizer applications is crucial to maximize its effectiveness and minimize any potential negative impacts. Generally, there are two main seasons for fertilizing your lawn: spring and fall.
In the spring, it's best to apply a slow-release fertilizer to provide a steady supply of nutrients as the grass begins to grow. This helps to promote healthy root development and vigorous top growth. Spring fertilization should be done when the soil temperature reaches around 55 to 60 degrees Fahrenheit, which is usually around the time when the first flush of grass growth occurs.
In the fall, it's recommended to apply a fertilizer that is higher in potassium, as this helps to strengthen the grass roots and improve winter hardiness. Fall fertilization should be done about 4 to 6 weeks before the first expected frost. This allows enough time for the lawn to absorb the nutrients and strengthen before winter.
It's important to follow the specific instructions provided by the manufacturer when applying fertilizer. Over-fertilizing can lead to excessive growth, increased susceptibility to diseases, and environmental pollution. Applying too little fertilizer may not provide the desired results. It's always best to err on the side of caution and apply the recommended amount.
By properly fertilizing your lawn and selecting the right type of fertilizer, you can ensure that your lawn remains healthy, vibrant, and resistant to pests and diseases.
Tip 5: Seed or overseed the lawn

Maintaining a lush and healthy lawn is every homeowner's dream. One effective way to achieve this is through seeding or overseeding. Seeding is the process of planting grass seeds in areas where the lawn is thin or bare, while overseeding involves spreading grass seeds over the entire lawn to rejuvenate it. In this section, we will explore the purpose of seeding or overseeding, how to determine if your lawn needs it, and the steps to do it properly.
What is the purpose of seeding or overseeding the lawn?
The primary goal of seeding or overseeding is to improve the overall health and appearance of your lawn. Over time, lawns can become thin or develop patches due to various reasons such as foot traffic, weather conditions, or diseases. Seeding or overseeding helps to fill in these bare areas with new grass, enhancing the density and promoting a more uniform and vibrant lawn. It also helps to prevent weed growth by reducing empty spaces where weeds can take root.
How can you determine if your lawn needs seeding or overseeding?
Assessing the condition of your lawn is crucial in determining whether it requires seeding or overseeding. Look out for signs of thinning grass, bare patches, or areas with slow growth. If you notice these issues, it is likely that your lawn would greatly benefit from seeding or overseeding. Additionally, consider the type of grass you have and its specific growth habits. Some grass types naturally thin out over time, making seeding or overseeding a necessary maintenance step.
What are the steps for properly seeding or overseeding your lawn?
Properly seeding or overseeding your lawn involves a few key steps to ensure successful germination and growth. Here is a simple guide to follow:
Preparation: Start by preparing the soil in the areas you plan to seed or overseed. Remove any debris, rocks, or weeds and loosen the soil using a rake or garden fork. This will create a better environment for the grass seeds to germinate.
Select suitable grass seeds: Choose a high-quality grass seed that is appropriate for your region and climate. Consider factors such as sunlight exposure, soil type, and water availability when selecting the seed.
Seed distribution: Spread the grass seeds evenly over the designated areas, ensuring sufficient coverage. For overseeding, use a broadcast spreader or simply scatter the seeds by hand. Make sure to follow the instructions on the seed packaging for recommended seeding rates.
Watering: After seeding, water the lawn gently to moisten the soil. Keep the soil consistently moist throughout the germination period, usually around 2 to 3 weeks. Avoid overwatering, as it can cause the seeds to rot or wash away.
Maintenance: As the new grass begins to grow, gradually reduce the watering frequency while increasing the duration. This will encourage deeper root development. Start mowing once the grass reaches a height of about 3 inches, ensuring not to remove more than one-third of the grass blade length at a time.
By following these steps, you can effectively seed or overseed your lawn and enjoy a thick, lush carpet of grass that enhances the beauty of your outdoor space. Remember to provide proper care and maintenance to ensure the long-term health and vitality of your lawn.
Tip 6: Control weeds

Weeds can be a constant nuisance in our lawns. Not only do they detract from the overall appearance of your lawn, but they also compete with your grass for nutrients, water, and sunlight. That's why it's essential to control weeds to maintain a healthy and beautiful lawn.
Why is weed control necessary for a healthy lawn?
Weed control is necessary for a healthy lawn for several reasons. First and foremost, weeds can quickly spread and take over your lawn if left unchecked. This can result in thinning grass and bare patches, making your lawn more susceptible to diseases and pests.
Additionally, weeds can compete with your grass for vital resources like water, nutrients, and sunlight. As the weeds grow taller, they can shade out the grass and prevent it from receiving the sunlight it needs to thrive. This can lead to weak and stunted growth of your grass, ultimately resulting in an unhealthy lawn.
Furthermore, certain types of weeds, such as dandelions and crabgrass, have deep root systems that can penetrate the soil and make it difficult for your grass to establish strong roots. This weakens the overall structure of your lawn, making it more susceptible to damage from foot traffic and environmental stressors.
By controlling weeds, you can create an environment where your grass has the best chance to grow strong, healthy, and lush.
What are some effective methods for weed control?
There are several effective methods for controlling weeds in your lawn. Here are a few options:
Hand Pulling: For small areas or individual weeds, hand-pulling can be an effective method. Make sure to remove the entire weed, including the roots, to prevent regrowth. This method is best suited for weeds with shallow root systems.
Mowing at the Proper Height: Keeping your lawn at the recommended mowing height can help prevent weed growth. Most grasses thrive when kept between 2 to 3 inches tall. By maintaining a healthy grass height, you can shade out weeds and prevent them from receiving the sunlight they need to grow.
Pre-Emergent Herbicides: Pre-emergent herbicides are applied before weed seeds germinate to prevent them from growing. These herbicides create a barrier on the soil surface and kill weed seedlings as they try to emerge. It's important to apply pre-emergent herbicides at the correct time, typically in the early spring or fall, before weed seeds start to germinate.
Post-Emergent Herbicides: If you already have weeds in your lawn, post-emergent herbicides can be effective for killing them. These herbicides are applied directly to the weeds and work by interfering with their growth and eventually killing them. It's important to carefully follow the instructions on the herbicide label to ensure safe and effective use.
Remember to always read and follow the instructions on herbicide labels, as improper use can damage your lawn and harm the environment.
Are there any natural or organic weed control options?
Yes, there are natural or organic weed control options available for those who prefer to avoid synthetic chemicals. Here are a few examples:
Hand Digging: Similar to hand pulling, hand digging involves using a small garden trowel or weed puller tool to remove weeds, including their roots, from the soil. This method requires more effort but can be effective, especially for smaller infestations.
Mulching: Applying a layer of organic mulch, such as wood chips or straw, around your plants and in your garden beds can help suppress weed growth. The mulch acts as a physical barrier, blocking sunlight and preventing weed seeds from sprouting.
Vinegar or Salt Solution: Some people use a mixture of vinegar or a saltwater solution as a natural weed killer. These solutions can be sprayed directly onto the weeds, causing them to dry out and die. However, it's essential to use these solutions carefully, as they can also harm desirable plants if not applied correctly.
Corn Gluten Meal: Corn gluten meal is a natural byproduct of corn processing and is known for its weed-suppressing properties. It can be applied to lawns and garden beds to prevent weed seeds from germinating. However, it's important to note that corn gluten meal is a pre-emergent herbicide, so it's most effective when used before weed seeds start to germinate.
When using natural or organic weed control options, it's important to manage expectations. Natural methods may not provide the same level of weed control as synthetic herbicides, and repeated applications may be necessary for effective results.
By implementing these natural or organic weed control options, you can minimize the use of synthetic chemicals in your lawn and garden while still keeping weeds at bay.
Tip 7: Prune trees and shrubs
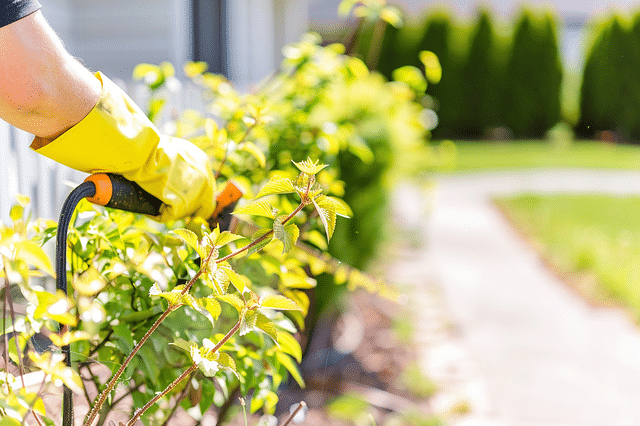
Taking care of your trees and shrubs is essential for maintaining a healthy and beautiful garden. One important task you shouldn't overlook is pruning. Pruning involves removing specific branches or parts of a plant to promote healthier growth. But why is pruning so important for the overall health of trees and shrubs? Let's find out!
Why is pruning important for the overall health of trees and shrubs?
Pruning plays a crucial role in maintaining the overall health of trees and shrubs. Here are a few reasons why pruning is beneficial:
Removes dead or diseased branches: Pruning allows you to remove dead or diseased branches, preventing the spread of disease and pests. By removing these unhealthy branches, you create space for new growth.
Promotes proper growth: Pruning helps in shaping the tree or shrub, encouraging it to grow in a specific direction. It promotes the development of a strong and balanced structure, preventing branches from growing too close together or crossing paths, which can lead to rubbing and potential damage.
Increases airflow and sunlight: By removing crowded or overgrown branches, pruning improves the airflow and allows more sunlight to reach the inner parts of the plant. This helps in reducing the risk of fungal diseases and promotes the growth of lush leaves and vibrant flowers.
Controls size and shape: Pruning lets you control the size and shape of your trees and shrubs. It helps in preventing them from outgrowing their allotted space and encroaching on other plants or structures in your garden.
Remember, it's essential to use proper pruning techniques and tools to avoid causing any damage to the plants. Now that you understand the importance of pruning, let's move on to the next question.
When is the best time to prune trees and shrubs?
Timing is crucial when it comes to pruning trees and shrubs. The ideal time to prune depends on the type of plant and its blooming cycle. Here are some general guidelines to follow:
Deciduous trees and shrubs: These are plants that lose their leaves in the fall. The best time to prune them is during late winter or early spring before new growth starts. Pruning during this time allows the plant to heal quickly and minimizes the risk of disease or pest infestation.
Evergreen trees and shrubs: These plants retain their foliage throughout the year. The best time to prune evergreens is during late winter or early spring, just before the new growth appears. However, avoid pruning during the colder months when the plant is less likely to heal properly.
Flowering trees and shrubs: These plants produce flowers, and the best time to prune them varies depending on whether they bloom on old or new wood. If they bloom on old wood, prune after flowering. If they bloom on new wood, prune during late winter or early spring before new growth starts.
Always research and identify the specific pruning requirements for each plant you have in your garden, as some species may have unique pruning needs.
What are some pruning techniques for different types of trees and shrubs?
Different trees and shrubs require different pruning techniques to achieve the best results. Here are a few common pruning techniques for different types of plants:
Thinning: This technique involves selectively removing certain branches to increase light penetration and improve airflow. Thin out the dense areas of the plant to reduce the risk of fungal diseases and promote healthier growth.
Heading back: Heading back is the method of pruning that involves cutting back the branch to a lateral branch or bud. This technique is commonly used to shape and control the size of the plant.
Rejuvenation pruning: This technique is used to revive overgrown or neglected shrubs. It involves more severe pruning to remove a significant portion of the plant, stimulating new growth from the base.
Deadheading: Deadheading is the process of removing spent flowers, which promotes continuous blooming. It not only keeps the plant looking tidy but also redirects the plant's energy towards producing new flowers.
These are just a few pruning techniques, and the specific technique you'll use will depend on the purpose and needs of the particular tree or shrub you're working on. Always make sure to use clean, sharp tools and follow proper pruning guidelines to avoid damaging the plant.
Pruning can be an enjoyable and rewarding gardening task. By understanding the importance of pruning, knowing the right time to prune, and being familiar with various pruning techniques, you can effectively care for your trees and shrubs and keep your garden looking vibrant and healthy.
Tip 8: Check and repair irrigation systems
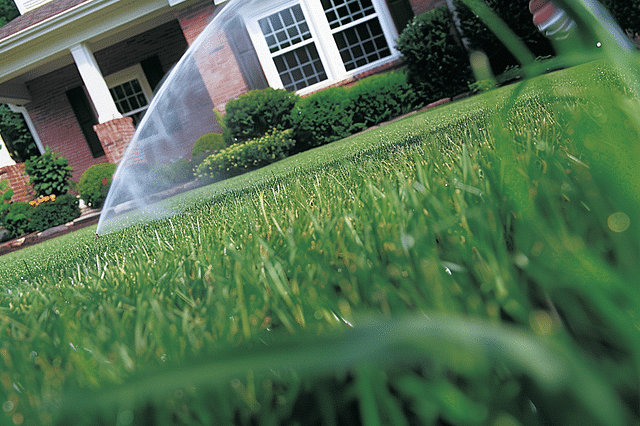
Properly maintaining your irrigation system is crucial for keeping your plants healthy and your landscape looking beautiful. In this section, we'll discuss why it's essential to have a properly functioning irrigation system, what you should look for when checking your irrigation system, and how to address common issues that may arise.
Why is it essential to have a properly functioning irrigation system?
Having a properly functioning irrigation system is essential for several reasons. First and foremost, it ensures that your plants receive the necessary amount of water to thrive. A well-maintained irrigation system can distribute water evenly and efficiently, preventing over or under-watering, which can lead to plant stress or even death.
Additionally, a properly functioning irrigation system helps conserve water. By ensuring that your system is in good working order, you can avoid leaks or other issues that result in water wastage. This not only helps to conserve a precious resource but also saves you money on your water bills.
What should you look for when checking your irrigation system?
When checking your irrigation system, there are a few key things to look out for:
Visual inspection: Walk around your landscape and check for any signs of water pooling, soggy areas, or dry patches. These could indicate problems with your irrigation system that require attention.
Sprinkler heads: Examine each sprinkler head to ensure that it is not damaged or blocked. Make sure they are properly aligned and spraying in the desired direction. Adjust or replace any malfunctioning sprinkler heads as needed.
Water pressure: Check the water pressure in your system. Low water pressure can result in uneven distribution of water, while high water pressure can lead to wastage and damage to the system. Use a pressure gauge to determine if the pressure is within the optimal range.
Leaks: Inspect your irrigation system for any leaks. Look for wet spots, damp areas, or signs of water damage around pipes, valves, and sprinkler heads. Address any leaks promptly to prevent further damage.
How can you address common issues with irrigation systems?
If you encounter any issues with your irrigation system, there are steps you can take to address them:
Adjusting sprinkler heads: If you notice that your sprinkler heads are not spraying evenly or are misaligned, use a screwdriver or other appropriate tool to adjust them. Make sure they are pointing in the right direction and providing adequate coverage to your plants.
Clearing blockages: If your sprinkler heads are clogged or blocked, carefully remove any debris or sediment that might be causing the obstruction. This will ensure that water can flow freely through the system.
Fixing leaks: If you discover any leaks in your irrigation system, it's important to address them promptly. Depending on the severity of the leak, you may be able to fix it yourself by tightening connections or replacing damaged components. However, for complex issues or extensive leaks, it's recommended to consult with a professional irrigation technician.
By regularly checking and repairing your irrigation system, you can ensure that it functions optimally, saving water and keeping your landscape healthy and thriving.
Tip 9: Test and adjust soil pH
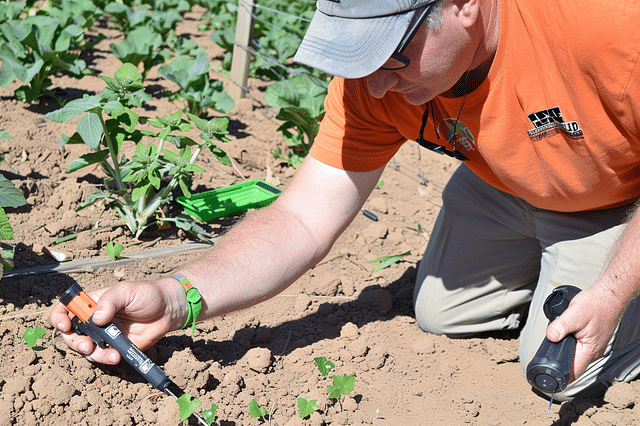
Maintaining the right soil pH level is vital for the health and success of your lawn and garden. In this section, we'll explore why testing and adjusting soil pH is important, how you can test your soil's pH levels, and various methods to adjust the pH if needed.
Why is it important to test and adjust soil pH in your lawn and garden?
Testing and adjusting soil pH is crucial because it directly affects the availability and absorption of essential nutrients for plant growth. Different plants thrive in different pH levels, and the wrong pH can limit nutrient uptake and hinder plant development. Whether you're growing vegetables, flowers, or lawn grass, having the correct pH level will enable your plants to absorb nutrients efficiently and flourish.
How can you test your soil's pH levels?
Testing your soil's pH levels is simple and can be done using a soil pH testing kit or by sending a soil sample to a local extension office or testing laboratory. Here are a few steps to help you test your soil's pH levels:
Collect a soil sample: Use a garden trowel or spade to collect soil from multiple locations in your lawn or garden. Make sure to avoid areas where fertilizers or other amendments have been recently applied.
Prepare the soil sample: Remove any debris, rocks, or roots from the collected soil. Break up any clumps and ensure the sample is well-mixed.
Use a pH testing kit: Follow the instructions provided with the testing kit to measure the pH of your soil. Most kits include paper test strips that change color when exposed to the soil.
Send the sample for professional testing (optional): If you prefer a more detailed analysis, you can send your soil sample to a local extension office or testing laboratory. They will provide you with precise results and often offer recommendations based on the specific needs of your plants.
What are some ways to adjust soil pH if needed?
Once you have determined the pH level of your soil, you may need to adjust it to create the optimal growing conditions for your plants. Here are a few methods to consider:
Adding organic matter: Incorporating organic matter such as compost, well-rotted manure, or leaf mold into your soil can gradually help adjust the pH towards the desired range. Organic matter buffers the soil, making it less acidic or alkaline over time.
Using lime to raise pH: If your soil is too acidic, adding lime can help raise the pH level. Lime contains calcium carbonate, which neutralizes acidity and brings the pH closer to the desired range. It's important to follow the recommended application rates on the lime package and retest the soil pH after a few months to monitor the changes.
Applying sulfur to lower pH: If your soil is too alkaline, sulfur can be used to lower the pH level. Sulfur reacts with soil moisture and bacteria to produce sulfuric acid, which reduces alkalinity. Similar to lime, it's crucial to follow the recommended application rates and retest the soil pH periodically.
Remember, adjusting soil pH is a gradual process, and it's essential to monitor pH levels over time. Regular testing and adjustment will ensure your lawn and garden thrive in the optimal growing environment.
Tip 10: Mulch flower beds and garden areas
Mulching flower beds and garden areas is a simple and effective way to improve the health of your plants and enhance the overall appearance of your yard. In this section, we will explore the benefits of mulching, different types of mulch to use in your yard, and how to properly apply mulch to flower beds and garden areas.
What are the benefits of mulching flower beds and garden areas?
Mulching offers a wide range of benefits for your flower beds and garden areas. First and foremost, mulch helps to retain moisture in the soil by reducing evaporation. This is especially important during hot summer months when plants are particularly vulnerable to drying out. By retaining moisture, mulch helps to keep your plants hydrated and reduces the need for frequent watering.
Another significant benefit of mulching is weed control. A layer of mulch over the soil acts as a barrier, preventing weed seeds from germinating and competing with your plants for water and nutrients. This saves you time and effort, as you won't have to spend as much time pulling weeds or using herbicides.
Mulching also helps to regulate soil temperature. It acts as insulation, keeping the soil cooler in the summer and warmer in the winter. This is particularly beneficial for plants with shallow roots, as it provides a more stable and favorable environment for their growth and development. Moreover, mulch can prevent erosion by reducing the impact of heavy rains and winds on bare soil.
What are different types of mulch to use in your yard?
When it comes to choosing the right mulch for your yard, there are several options to consider. Organic mulches, such as shredded bark, wood chips, straw, and leaves, are popular choices. They are readily available, affordable, and provide numerous benefits to your plants and soil. Organic mulches break down over time, adding valuable nutrients to the soil and improving its structure.
Another option is inorganic mulch, which includes materials like rocks, gravel, and rubber. Inorganic mulches are low maintenance, do not break down, and can add an attractive aesthetic to your plants. However, they do not improve soil fertility like organic mulches do.
It's important to choose a mulch that suits your specific needs and preferences. Consider factors such as cost, availability, aesthetic appeal, and the specific requirements of your plants. Experiment with different types of mulch to find the one that works best for you.
How should you properly apply mulch to flower beds and garden areas?
To get the most out of your mulch, it's essential to apply it properly. Start by preparing the area by removing any existing weeds or grass. You can use a garden rake or hoe to clear the area. Once the area is clear, spread a layer of mulch that is about 2 to 3 inches thick. Be careful not to pile mulch up against the trunks or stems of plants, as this can lead to rot or pest problems.
Leave a small gap around the base of plants to allow for air circulation and prevent moisture buildup. If possible, extend the mulch layer out to the drip line of trees and shrubs to provide maximum benefits. It's important to periodically check your mulch layer and add more if necessary, as it can break down or get washed away over time.
By following these simple steps, you can ensure that your flower beds and garden areas are properly mulched for maximum health and beauty.
Tip 11: Plan and start your spring gardening

Spring is a great time to start a garden, but it's important to have a plan in place before you begin. Planning ahead will help ensure a successful and bountiful garden. In this section, we will discuss why planning is important, as well as some popular spring plants and vegetables to consider. Additionally, we will provide guidelines to help you get started on your spring garden.
Why is planning important for a successful spring garden?
Planning is crucial for a successful spring garden because it helps you make the most of your available space, time, and resources. When you have a clear plan in place, you can strategically choose what plants and vegetables to grow based on factors such as sunlight requirements, soil conditions, and available space.
By planning ahead, you can also determine the layout of your garden and ensure that each plant has enough room to grow and thrive. This will prevent overcrowding and allow for better airflow, reducing the risk of disease and pest infestations.
Additionally, planning helps you stay organized and ensures that you have all the necessary materials and tools on hand before you start your garden. It allows you to estimate the quantity of seeds, soil, compost, and fertilizers you will need, helping you avoid last-minute trips to the store.
What are some popular spring plants and vegetables to consider?
When planning your spring garden, it's important to consider the plants and vegetables that thrive in the springtime. Some popular options include:
Lettuce: Lettuce is a cool-season vegetable that grows well in the spring. It comes in different varieties, such as leaf lettuce, romaine lettuce, and butterhead lettuce, offering a range of flavors and textures to choose from.
Spinach: Spinach is another cool-season crop that thrives in the spring. It is packed with nutrients and can be harvested when the leaves are young and tender.
Carrots: Carrots are root vegetables that prefer cool weather and are perfect for spring planting. They are easy to grow and can be enjoyed fresh or stored for later use.
Radishes: Radishes are quick-growing vegetables that are ready to harvest in just a few weeks. They add a refreshing crunch and a burst of flavor to salads and other dishes.
Snap peas: Snap peas are a type of delicious and crunchy pea that can be eaten whole, pod and all. They are easy to grow and are a great addition to any spring garden.
These are just a few examples, and there are many other plants and vegetables that you can consider for your spring garden. The key is to choose varieties that are well-suited for your climate and growing conditions.
What are some guidelines for starting your spring garden?
Here are some guidelines to help you get started with your spring garden:
Choose the right location: Select a spot in your garden that receives ample sunlight and has well-draining soil. Most plants and vegetables require at least 6 hours of direct sunlight daily to thrive.
Prepare the soil: Ensure that the soil is healthy and rich in nutrients by adding compost or organic matter. This will provide a good foundation for your plants to grow.
Start seeds indoors: Some plants benefit from starting indoors before transplanting them into the garden. This gives them a head start and allows you to extend the growing season. Follow the instructions on the seed packet for the best results.
Plant at the right time: Different plants have different planting times, so make sure to check the recommended planting dates for each variety. Planting too early or too late can affect the growth and productivity of your garden.
Water regularly: Keep your garden well-watered, especially during dry spells. Most plants require around 1 inch of water per week, either from rainfall or manual watering.
Monitor for pests and diseases: Regularly inspect your plants for any signs of pests or diseases. Early detection can help prevent the spread and minimize damage. Consider using natural remedies or organic pesticides if necessary.
Harvest and enjoy: Once your plants are ready for harvest, pick them at their peak ripeness for the best flavor and nutritional value. Don't forget to savor the fruits of your labor and share the abundance with family and friends!
By following these guidelines and planning ahead, you can have a successful and enjoyable spring gardening experience. Happy gardening!
Trending products
Shop outdoor accessories


Frequently asked questions
- Why is it important to prepare my lawn and backyard for spring?
- Preparing your lawn and backyard for spring helps promote healthy growth, prevents weeds and pests, and ensures a beautiful outdoor space for relaxation and enjoyment.
- What are some key tips for preparing my lawn and backyard for spring?
- Some essential tips include cleaning up debris, aerating the soil, fertilizing, seeding, and pruning plants to promote new growth and vibrant colors.
- When is the best time to start preparing my lawn and backyard for spring?
- It is recommended to start preparing your lawn and backyard for spring as soon as the weather starts warming up and the ground thaws, typically in early to mid-spring.
- How can I clean up my lawn and backyard after winter?
- You can clean up your lawn and backyard by removing any dead leaves, branches, and debris, as well as raking and mowing the grass to give it a fresh start for spring.
- Do I need to fertilize my lawn and backyard in preparation for spring?
- Fertilizing your lawn and backyard in spring helps provide essential nutrients for new growth and helps the grass and plants recover from the winter months.
- What is the importance of aerating the soil in preparation for spring?
- Aerating the soil helps improve drainage, reduce compaction, and allow air, water, and nutrients to reach the roots of your grass and plants, promoting healthy growth.
- How can I ensure a vibrant and colorful backyard in spring?
- You can ensure a vibrant and colorful backyard in spring by planting new flowers, shrubs, and plants, as well as adding mulch to retain moisture and suppress weeds.
- Is it necessary to prune plants and trees before spring?
- Pruning plants and trees before spring helps remove dead or damaged branches, promotes new growth, and shapes the plants to maintain a neat and tidy appearance in your backyard.
- How can I prevent weeds and pests in my lawn and backyard during spring?
- To prevent weeds and pests in your lawn and backyard during spring, you can use organic mulch, apply natural pest control methods, and regularly inspect your plants for any signs of infestations.
- Can I transform my yard with these tips even if I have limited gardening experience?
- Absolutely! These tips are designed to be easy to follow for beginners and experienced gardeners alike, helping you transform your yard into a beautiful outdoor space without extensive gardening knowledge.
Are you looking for more ideas?
Have a look at these other guides about improving your garden and patio to create your dream outdoor space!

Are you looking for more ideas?
-
- Role
- Composting Tomatoes for an Eco-Friendly Soil Boost!
- Description
- Discover the hidden benefits of composting tomatoes for an eco-friendly soil boost! Learn step-by-step how to compost tomatoes and enhance your harvest while contributing to a healthier environment.
-
- Role
- Embracing Minimalism: Outdoor Furniture Trends for the Modern Home
- Description
- Explore how the minimalist trend is influencing outdoor furniture design, and discover pieces that exemplify this style.
-
- Role
- Outdoor Furniture Trends to Watch in Fall
- Description
- Learn about the latest trends in outdoor furniture for the fall season, from cozy fire pits to plush outdoor blankets.
-
- Role
- Hot Outdoor Furniture Materials
- Description
- Discover the top material trends in outdoor furniture for the current year, from natural wood to recycled plastics.